Build It Right the First Time

Lee Duerst • April 21, 2026

Planning Insulation & Air Sealing for a New Home

Building a new home is exciting. Floor plans, finishes, paint colors… it all comes together fast.

But there’s one part of the house you won’t see when it’s done—and it might be the most important:

How well it’s sealed and insulated.

Because once the drywall goes up, your options shrink. A lot.

Code Minimum ≠ Comfort Maximum

Most new homes are built to meet code. That’s the requirement.

But code is a baseline—not a performance goal.

A house built to minimum code can still have:

  • Drafty rooms
  • Uneven temperatures
  • Higher energy bills than expected
  • Ice dams (yes, even in a brand-new home)

If you’re building from scratch, this is your chance to go from “meets code” to “built right.”

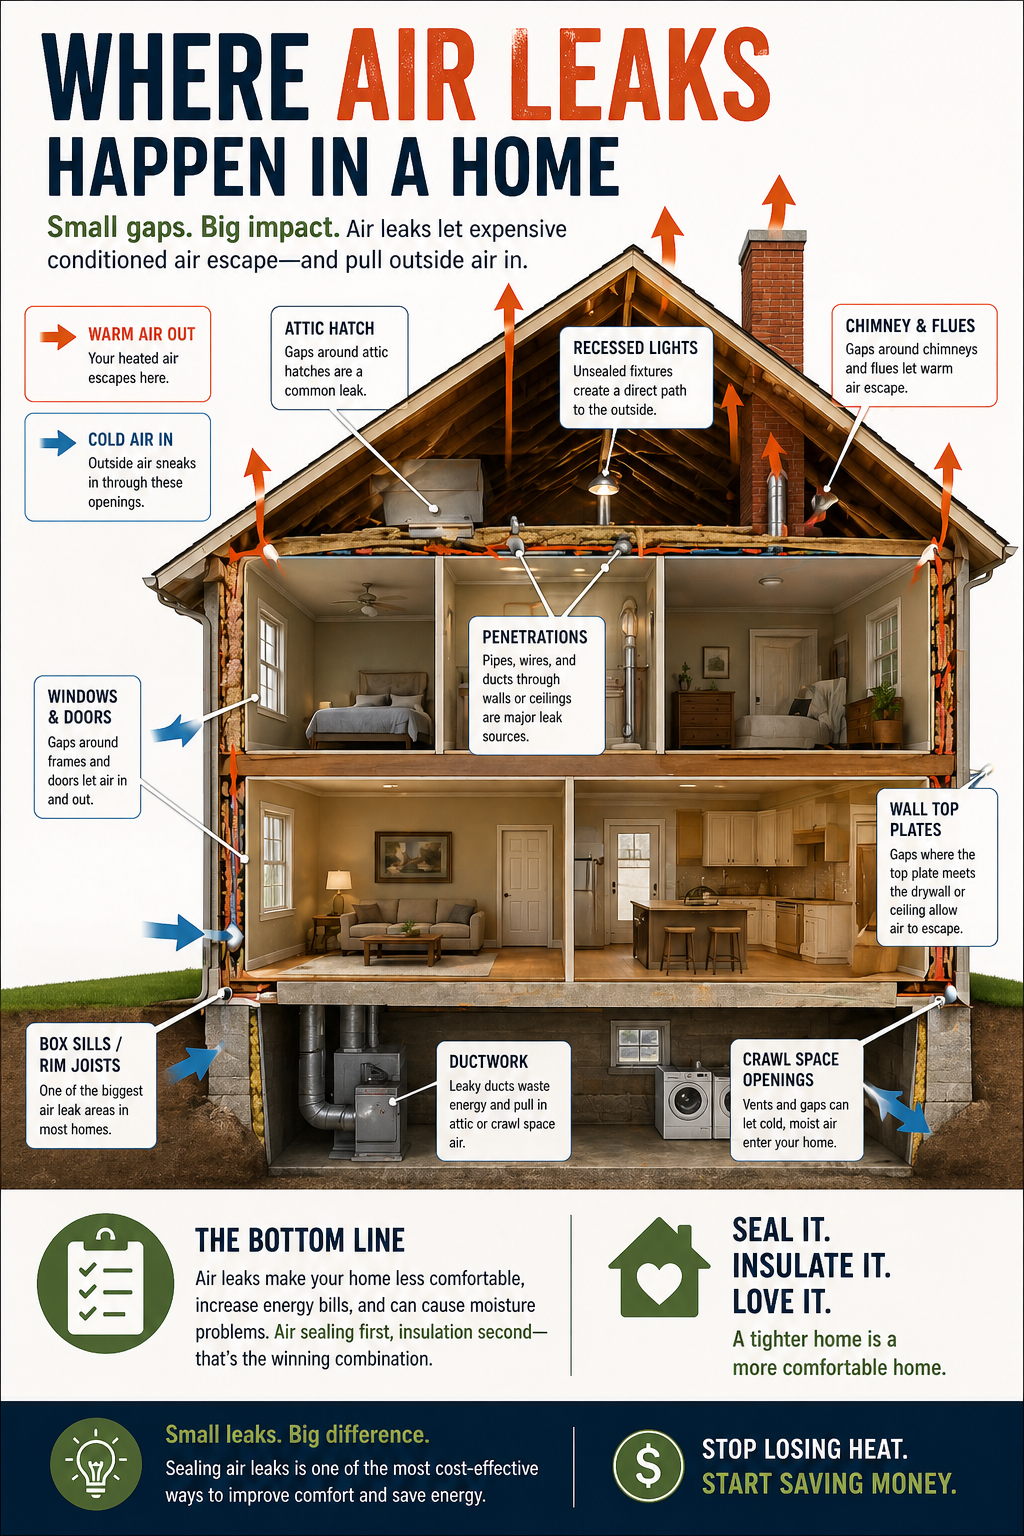
Air Sealing Comes First (Always)

Before insulation goes in, the house should be sealed.

That means closing the hidden gaps where air sneaks in and out:

  • Top plates (attic side)
  • Wire and plumbing penetrations
  • Around windows and doors
  • Rim joists / box sills

Think of it this way:

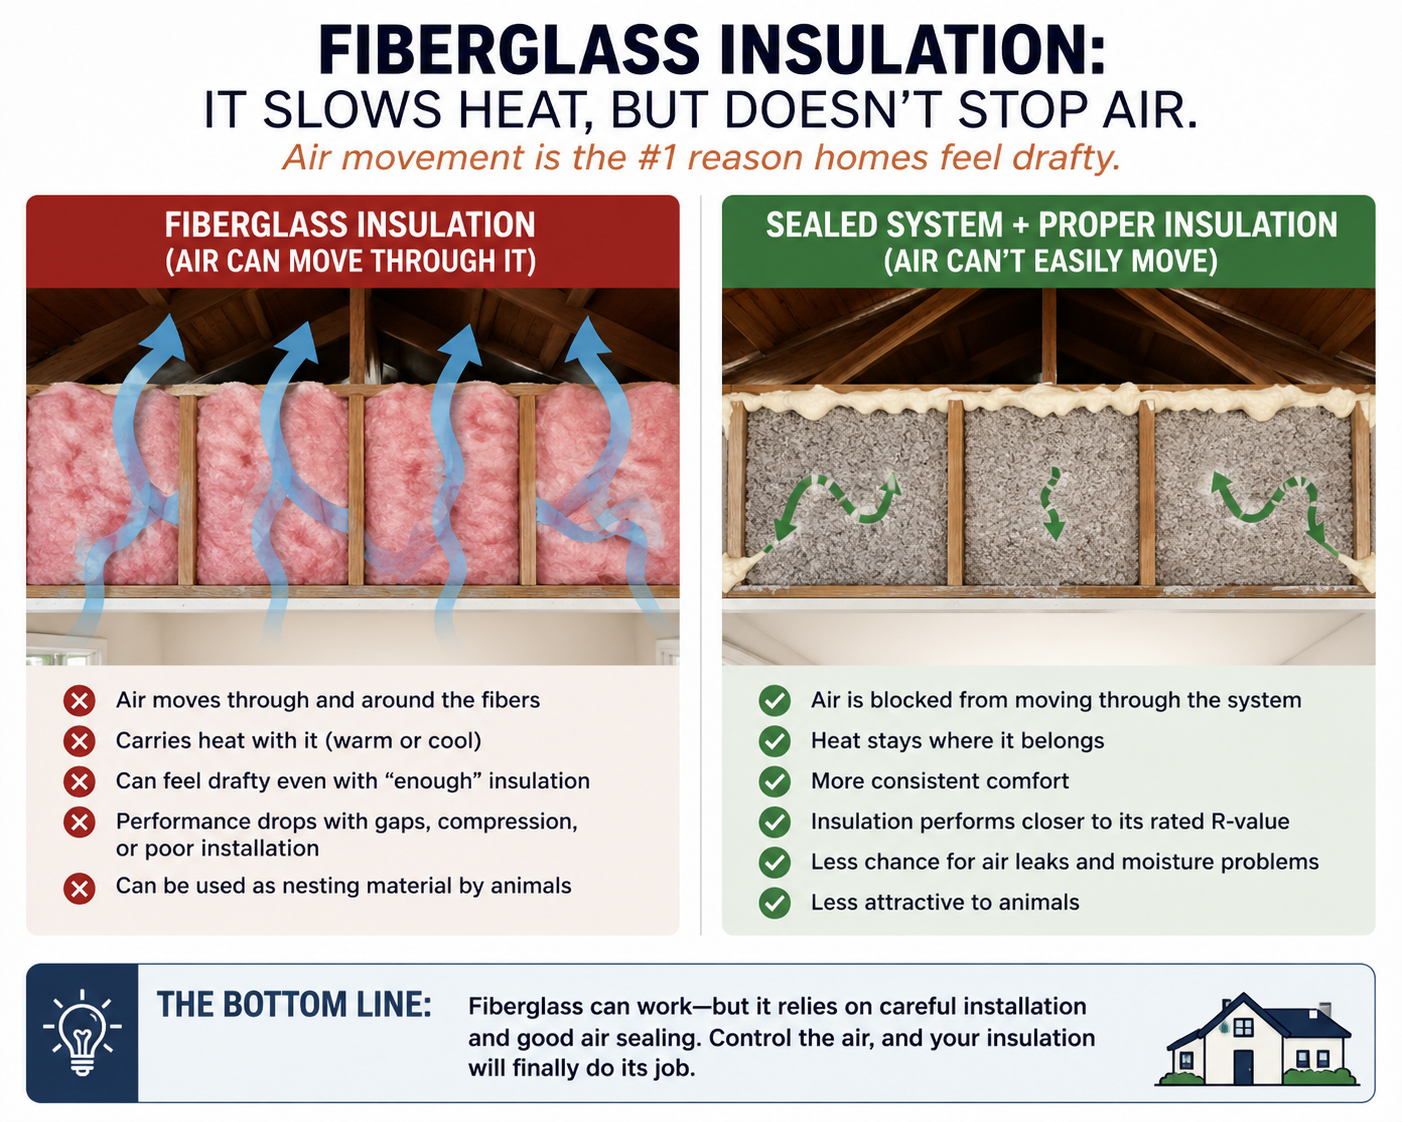
Insulation slows heat.
Air sealing stops air.

If air is moving, insulation can’t do its job properly.

The Attic: Your Biggest Opportunity

In southern Wisconsin, the attic is usually the #1 place to get it right.

A well-done attic should include:

  • Thorough air sealing at the ceiling plane
  • Proper ventilation (balanced intake and exhaust)
  • Adequate insulation depth (often beyond code)

Skipping any one of these can lead to:

  • Heat loss
  • Moisture issues
  • Ice dams in winter
  • Hot upper floors in summer

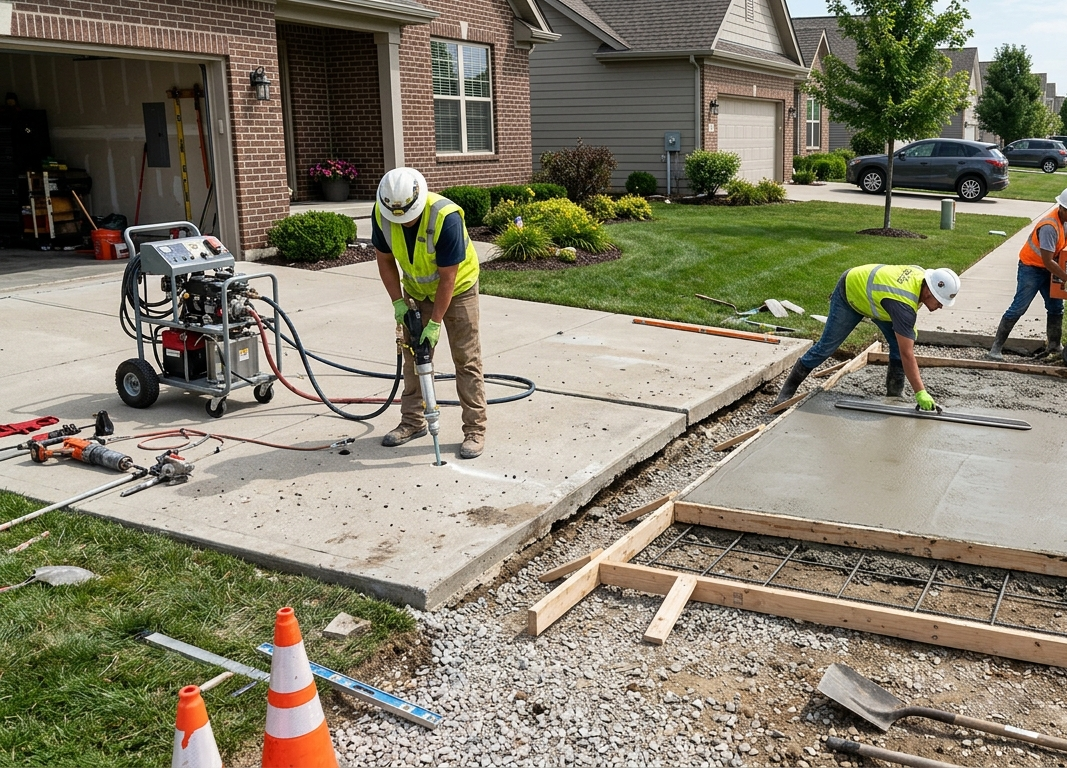
Don’t Ignore the Box Sills

Box sills (rim joists) are one of the most overlooked areas in new construction.

They’re also:

  • A major source of air leakage
  • A cold spot in winter
  • Often under-insulated or poorly sealed

A small investment here makes a noticeable difference in comfort—especially on those January mornings.

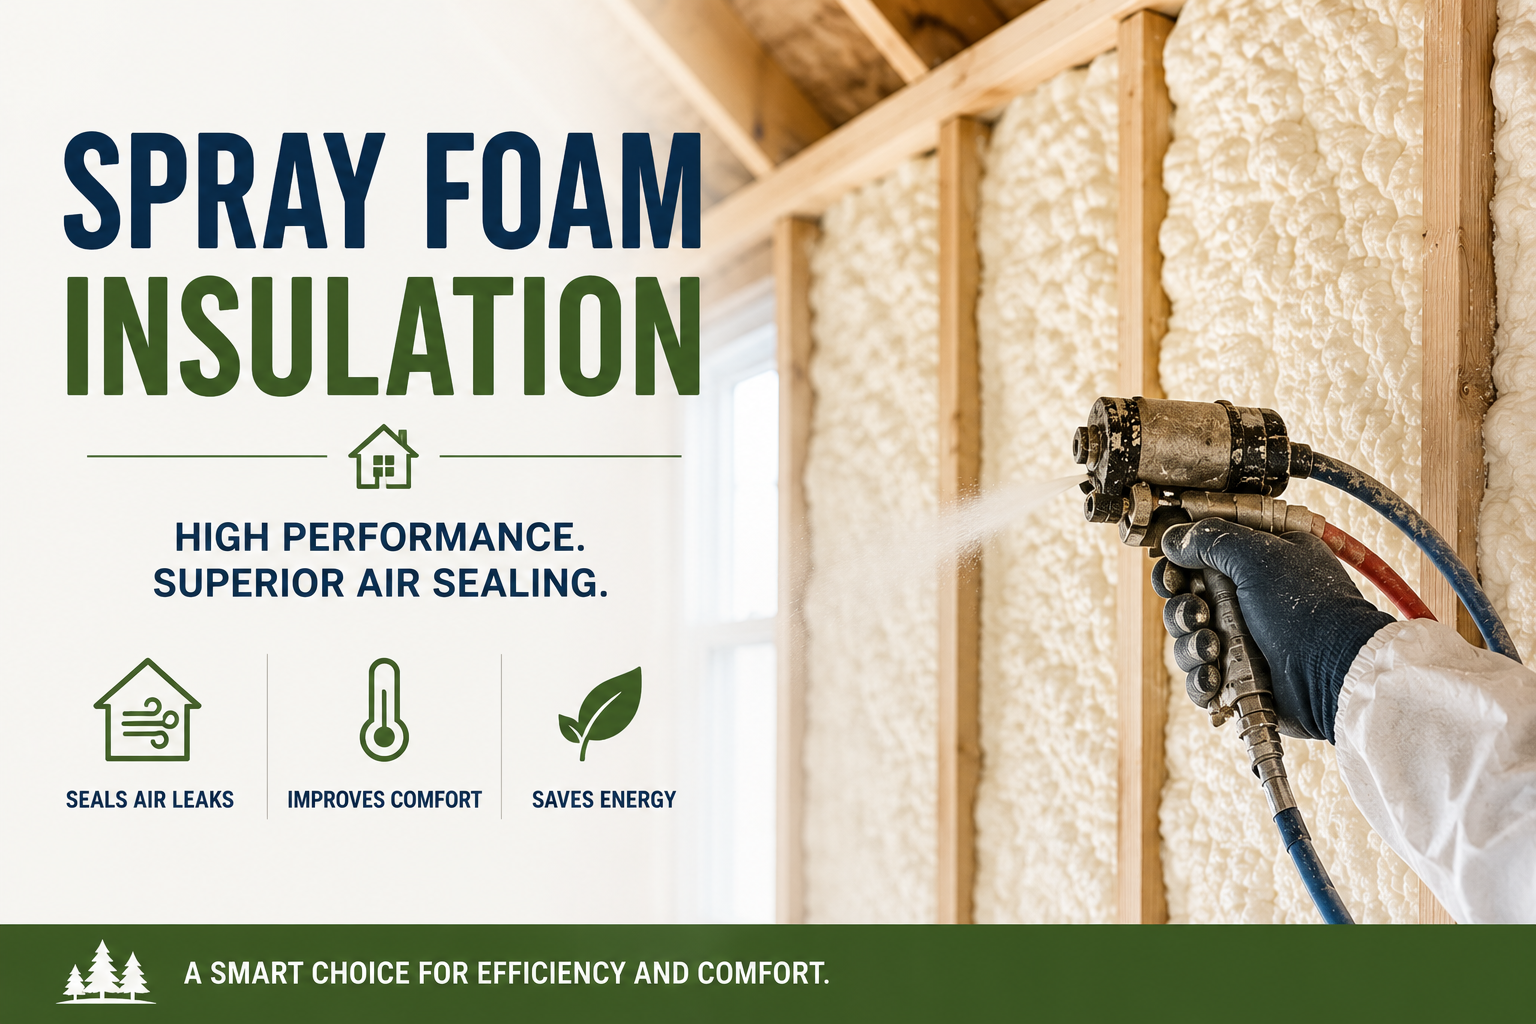
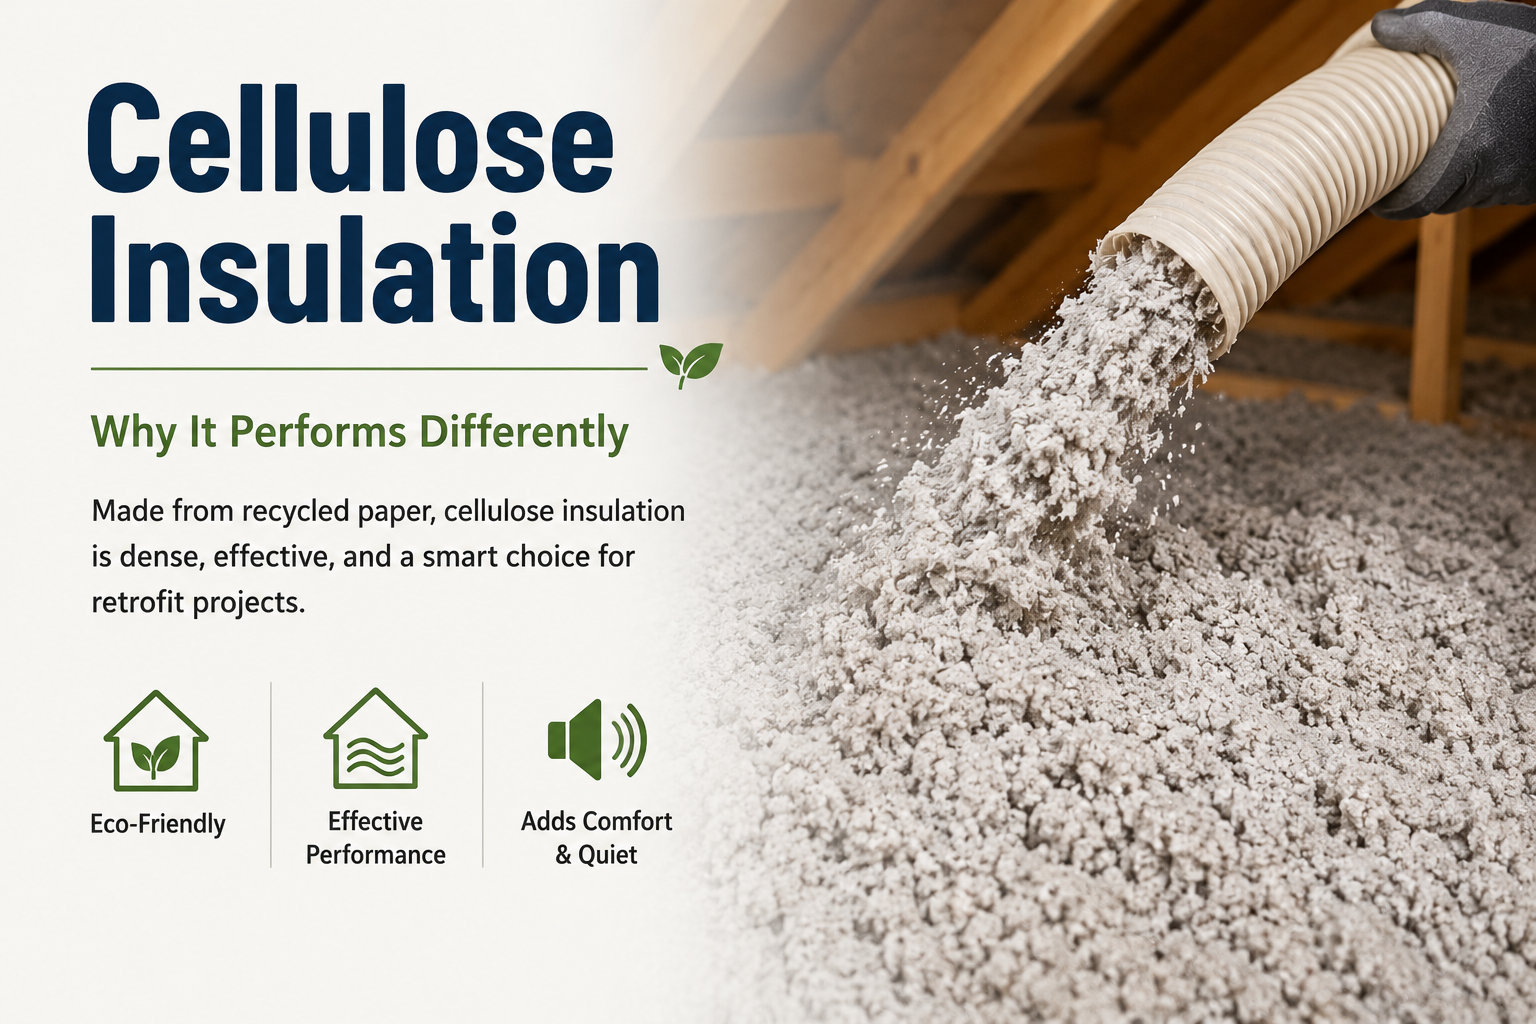
Choosing Insulation Materials

There’s no one-size-fits-all answer, but here’s the quick breakdown:

  • Cellulose (blown or dense-pack)
    Great for attics and walls. Cost-effective, solid performance.
  • Spray foam (open or closed cell)
    Excellent air sealing + insulation in one step. Higher cost, but powerful in the right locations (rim joists, complex areas).
  • Fiberglass
    Works when installed perfectly… which is less common than you’d hope.

The best approach is usually a combination, not a single product everywhere.

Plan It Early—or Pay for It Later

Once drywall is up:

  • Air sealing becomes difficult or impossible in some areas
  • Fixes become expensive
  • Comfort issues become permanent (or at least persistent)

Planning ahead lets you:

  • Seal everything properly
  • Choose the right materials
  • Avoid costly upgrades later

Final Thought

If you’re building and want a second set of eyes before insulation goes in, we’re happy to take a look.

You’re already making a big investment. A little extra planning for insulation and air sealing won’t change how your house looks—but it will absolutely change how it feels.

Warmer in winter. Cooler in summer. And a lot less money escaping through the cracks.

How Concrete Lifting Services Improve Safety Around Your Property
June 10, 2026
Fix uneven concrete before trips and falls happen. Duerst Insulation Technicians helps restore safer walkways and driveways quickly for families daily.
By Lee Duerst May 18, 2026
The Hidden Connection Between Gutters and Attics 
By Lee Duerst May 15, 2026
Rex and the Case of the 47-Year-Old Furnace
By Lee Duerst May 14, 2026
Rex Discovers Why Bathroom Fans Create Problems in Attics
By Lee Duerst May 12, 2026
Spray Foam Insulation: High Performance — But Is It Right for Every Home?
By Lee Duerst May 12, 2026
Cellulose Insulation: Why It Performs Differently
By Lee Duerst May 12, 2026
Fiberglass Insulation: Common, Affordable… and Often Misunderstood
By Lee Duerst April 29, 2026
The Hidden Air Leaks in Your Home
By Lee Duerst April 29, 2026
Gas Fireplaces: Convenience with Tradeoffs
By Lee Duerst April 29, 2026
Keep the Feature – Lose the Leak In previous posts, we established a few things: Fireplaces look great They’re not exactly energy all-stars And sometimes… they’re quietly working against your heating system But this isn’t a “never use your fireplace again” speech. It’s about using it smarter . Start With the Simplest Fix: Close the Damper Let’s begin with the obvious—because it’s often overlooked. Make sure the damper is fully closed when the fireplace isn’t in use Check it occasionally—it doesn’t always seal as tightly as you think A damper is better than nothing… …but it’s not an airtight solution. Think of it more like “slowing the leak” than “stopping it.” Take It a Step Further: Seal the Chimney When Not in Use If you rarely use your fireplace, this is where real improvement happens. Options include: Chimney balloons or plugs Top-sealing dampers (installed at the chimney cap) These: Block airflow more effectively Reduce heat loss significantly Help keep cold air from dropping into the house Just one rule: If you seal it—make sure you remove it before using the fireplace. (That’s a bad day otherwise.) Glass Doors: Helpful, With Limits Glass doors can: Reduce the amount of warm air pulled out of the house Improve safety (sparks, pets, kids) But they: Don’t make a fireplace “efficient” Don’t fully stop air movement Good upgrade—just don’t expect miracles. If You Use It Often, Use It Wisely For those who actually burn wood regularly: Burn dry, seasoned wood Use smaller, controlled fires Close the damper once the fire is completely out Avoid leaving it open overnight “just in case” And remember: Most traditional fireplaces still lose more heat than they produce. (Yes… even when they feel warm sitting right in front of them.) Consider an Upgrade (If It’s More Than Occasional Use) If the fireplace is part of your routine, not just a holiday guest appearance: You might look at: Fireplace inserts Sealed combustion units These: Burn more efficiently Reduce air loss Actually contribute to heating the space Now you’re moving from “ambiance” to “appliance.” Or… Rethink the Role Entirely If the fireplace isn’t used much: Seal it properly Turn it into a design feature Think: Artwork Plants Decorative logs or candles You keep the character… without the energy penalty. The Bottom Line A fireplace doesn’t have to be a problem. But left alone, it often is. The goal isn’t to get rid of it— it’s to decide what role it plays in your home. Occasional use → manage the airflow Frequent use → improve the system No use → seal it and enjoy the look Final Thought Fireplaces are great at creating atmosphere. Just don’t let them quietly heat the outdoors while you’re paying the bill. Thinking about a gas fireplace? Check out the pros and cons in this post .
Show More