Spring in Madison is a welcome sight—snow melts, the sun comes back, and homeowners can finally step outside without wondering if their eyelashes will freeze together. Unfortunately, utility bills are not always as eager to improve with the weather.
The good news is that you do not need a major remodel to start cutting energy costs. A handful of simple, low-cost DIY improvements can help reduce waste, improve comfort, and make your home a little easier on the budget.
1. Find and Seal Air Leaks
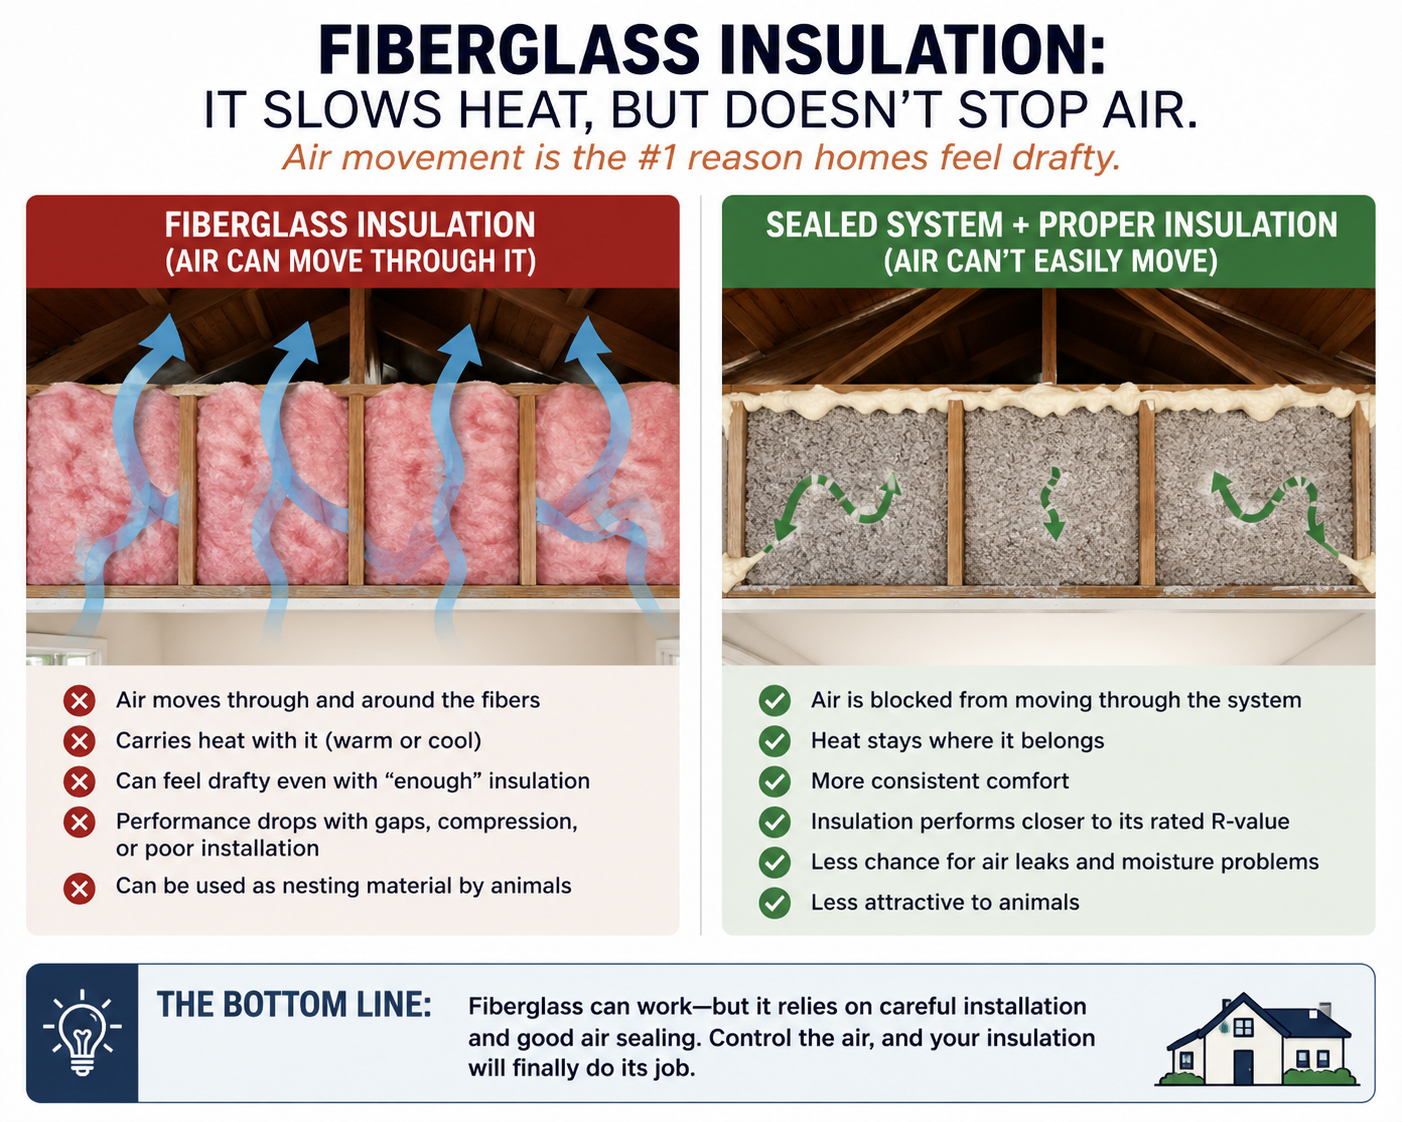
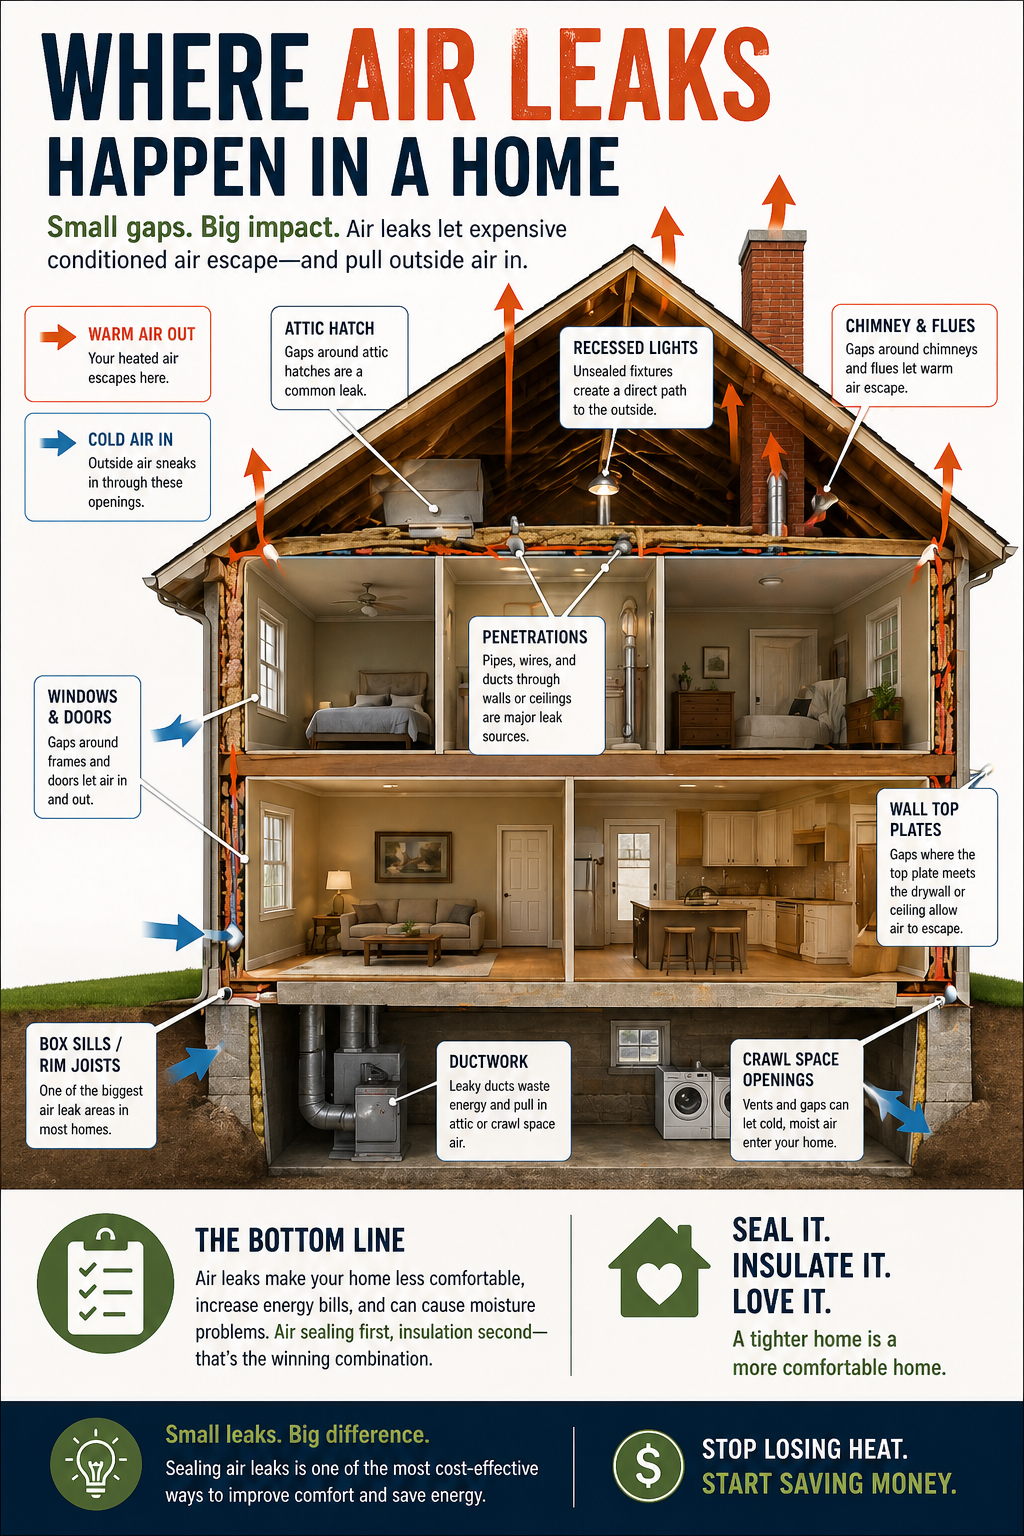
Most homes leak more air than people realize. Small gaps around windows, doors, attic hatches, basement box sills, and even outlets on exterior walls can let heated or cooled air slip away. A little caulk or weatherstripping can make a noticeable difference.
Estimated DIY cost: about
$10 to $40
Why it helps: You are paying to heat and cool your home, not the outdoors.
2. Adjust Your Thermostat
This is not glamorous, but it works. In winter, around
68°F when you are home is a common target. In summer,
76 to 78°F can help keep cooling costs under control. Even a small adjustment can trim energy use over time.
Estimated DIY cost:
free
Optional upgrade: a basic programmable thermostat may cost about
$30 to $100+
3. Seal and Insulate the Attic Hatch
An attic hatch is often overlooked, but if it is not sealed and insulated, it can act like a weak spot in the building envelope. Adding weatherstripping and attaching rigid foam insulation to the back of the hatch is a fairly simple project.
Estimated DIY cost: about
$20 to $60
Why it helps: It reduces heat loss in winter and heat gain in warmer weather.
4. Switch to LED Bulbs
If older incandescent or halogen bulbs are still hanging around, replacing them with LEDs is one of the easiest home energy upgrades available. LED bulbs use less electricity, last longer, and give off less waste heat.
Estimated DIY cost: about
$3 to $8 per bulb
Whole-house estimate: often around
$20 to $80, depending on how many bulbs you replace
5. Lower Water Heating Costs
Water heating can be a significant part of a utility bill. A few small changes can help:
- Lower the water heater setting to around
120°F
- Install low-flow shower heads
- Insulate exposed hot water pipes
Estimated DIY cost: about
$0 to $50
Why it helps: Less heat lost, less hot water wasted, less money disappearing every month
6. Cut “Phantom” Energy Use
Many electronics keep drawing electricity even when they appear to be off. TVs, gaming systems, office equipment, and chargers are common culprits. Using a power strip makes it easier to shut multiple devices off at once.
Estimated DIY cost: about
$10 to $25
Why it helps: Small savings individually, but they add up over time
7. Do Not Ignore the Box Sills
In Wisconsin homes, box sills are often a trouble spot. Poorly insulated or leaky box sills can let in outside air, create drafts, and increase heating costs. A DIY approach may include cutting rigid foam board to fit and sealing the edges.
Estimated DIY cost: about
$30 to $100, depending on the size of the area and materials used
Why it helps: This can be one of the more worthwhile low-cost upgrades in an older home
Quick DIY Energy Checklist
- ☐ Seal visible air leaks
- ☐ Adjust thermostat settings
- ☐ Insulate attic hatch
- ☐ Replace old bulbs with LEDs
- ☐ Lower water heater temperature
- ☐ Use power strips for electronics
- ☐ Check box sill insulation
A Few Dollars Here, A Few Dollars There...
Not every DIY improvement will dramatically slash your utility bill all by itself. But that is not really the point. These are affordable, manageable steps that can improve comfort and reduce waste without requiring a major investment.
Some homeowners may look at a
$10 fix and think, “I can do that this weekend.” Others may choose a few upgrades in the
$50 to $100 range and still come out ahead over time. Either way, having options matters.
And if these small projects reveal bigger issues—significant air leakage, under-insulated attics, or problem areas in the basement—that may be the time to bring in a professional.
Not sure where your home is losing energy? We can help identify problem areas and recommend practical improvements that make sense for your home and budget.